Low Cost/No Cost Teaching Tips - Subscribe Here Today

winsome arrows

EDUCATIONAL RESOURCES

Individualized strategies & support for the exceptional child, their families, and those who serve them

Grab Bag Redux

With the summer months upon us, it seemed like a good time to revisit last year's grab bag post.

Wondering how to keep your children's skills fresh without making everyone (including yourself) crazy during the long summer days?

Make a grab bag!

Here's how:

  1. Place directions or skill activities inside a plain, brown paper lunch bag.
  2. Have your child pull an activity from the bag at predetermined times throughout the day.
  3. You can also use two bags - one for skill review and one for fun free-time activities or small rewards after each skill review is done.
  4. Reuse skill reviews or activities as needed/desired throughout the summer while adding new ones along the way.
  5. Select the number of activities based on the age and abilities of your child.

More ideas:

  1. Partner with your child to select the activities. This will help increase his/her ownership of them.
  2. Select some days to be set apart for scavenger hunts in which following directions is the focus.
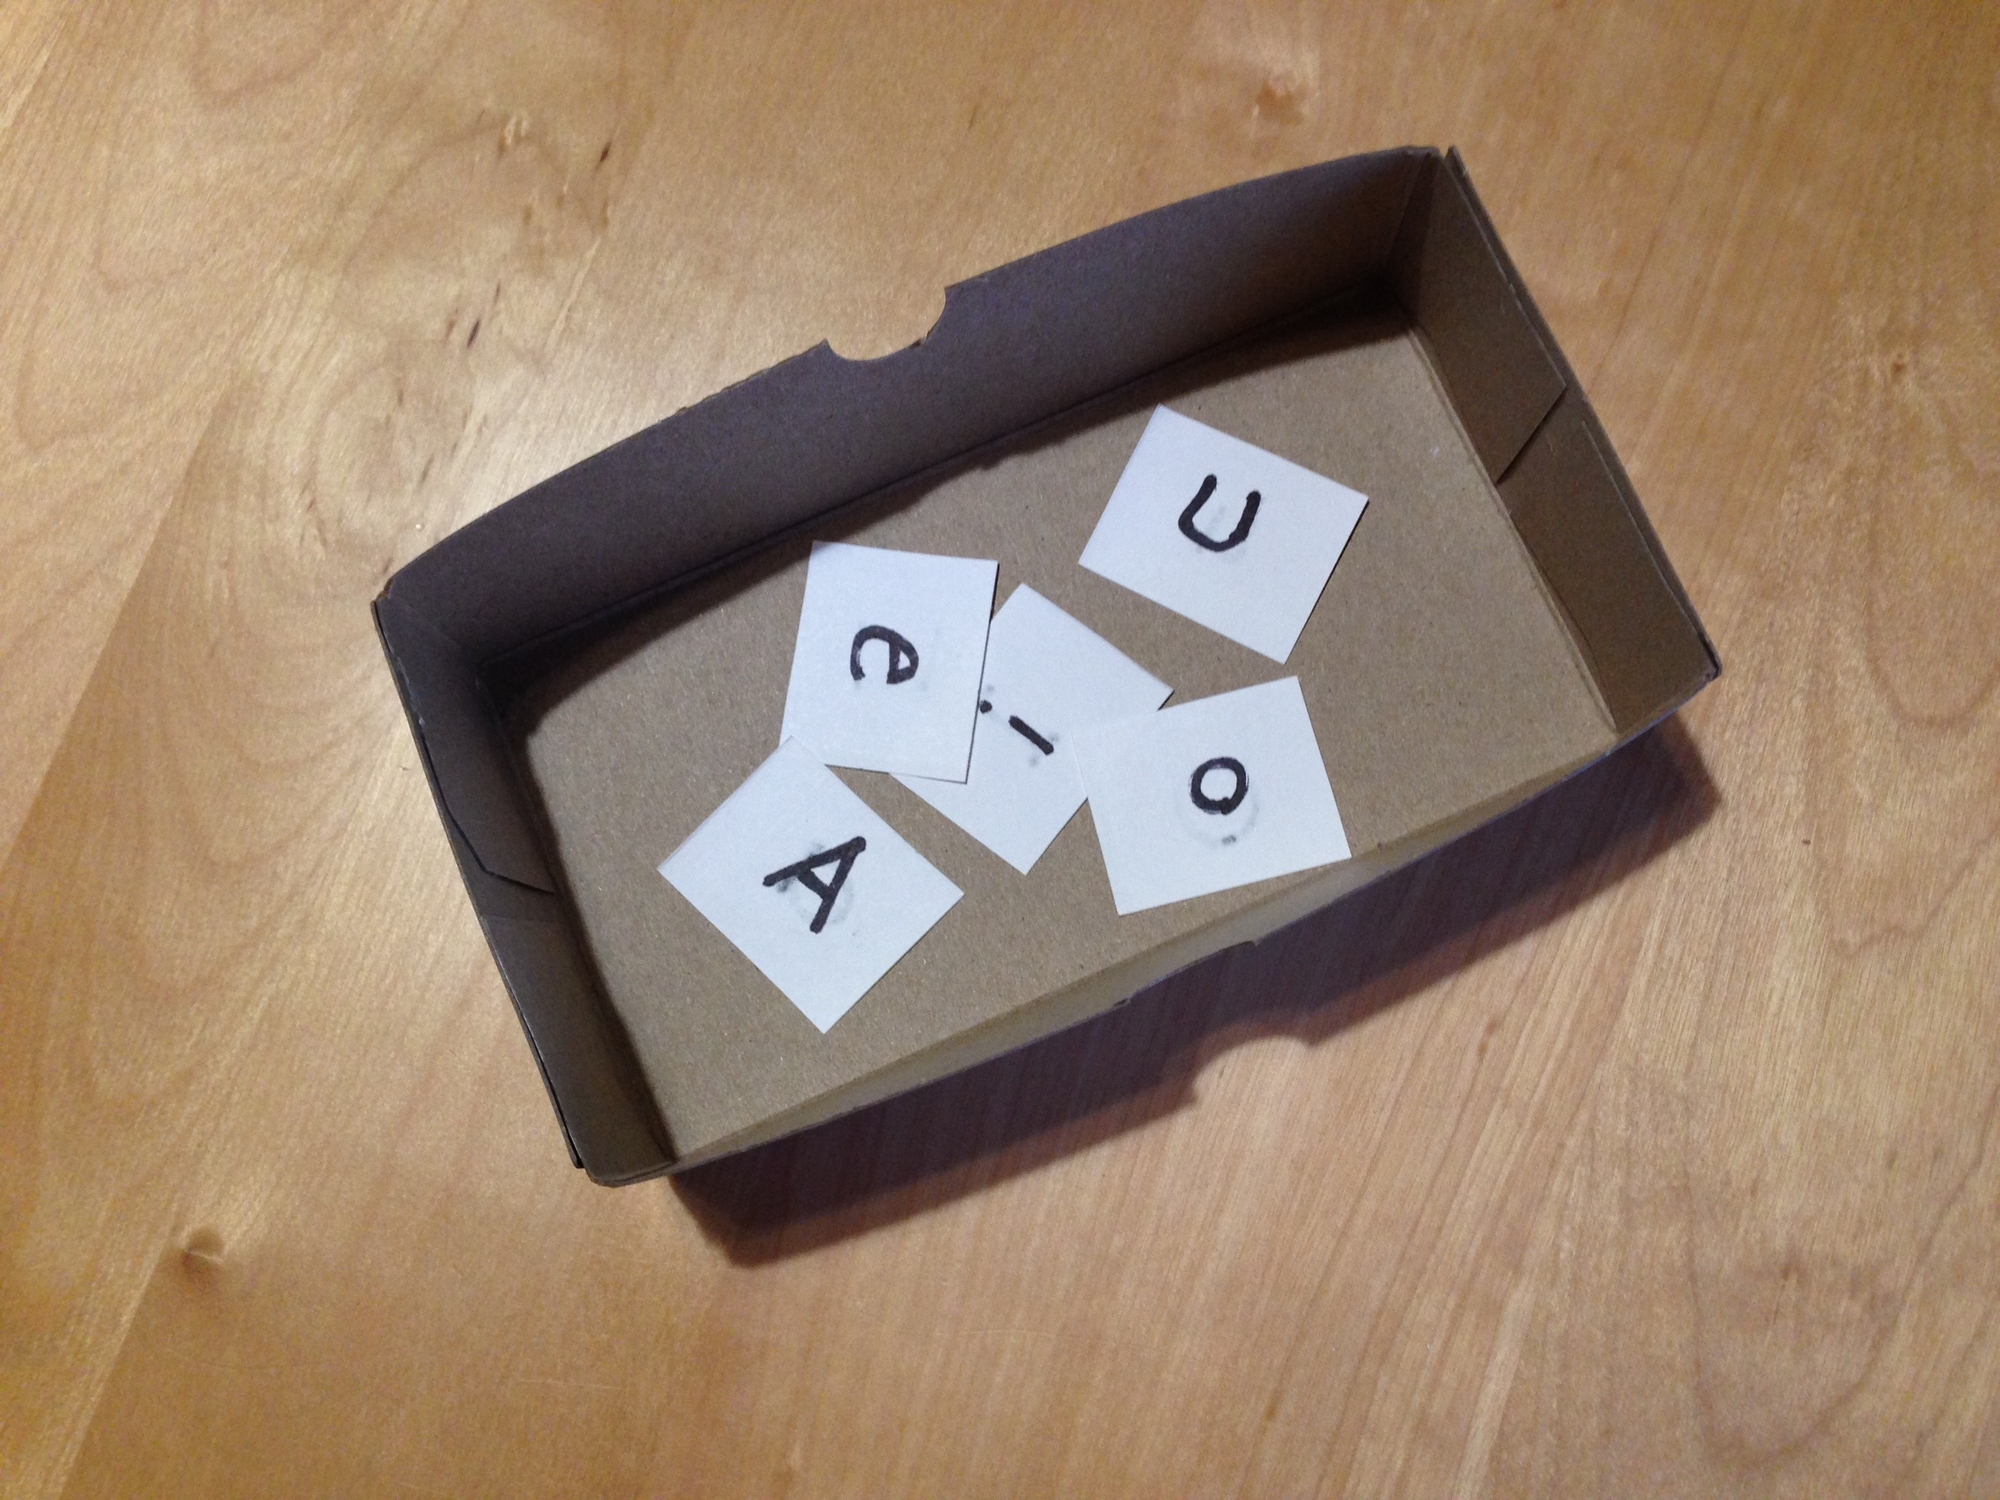
  3. If your child has begun (or progressed in) reading, try using vocabulary that he/she can read and offer your encouragement to this end. Simple picture clues can supplement or replace written directions, if desired, to help your child be as independent as possible.
  4. If your child is a non-reader or if you want to work on listening skills, record your directions for the activities.
  5. Here and there, consider adding household chores or service-to-others projects that you would like to accomplish.
  6. You may want to make a "family bag" or have a different one for each child. It could even be fun to let your children make one for you (with guidance, of course).
  7. It might be a good idea to create a way to keep track of completed tasks - a chart? a special spot to place finished work when possible? another container to hold the slips of paper from the bag when the activity is done?
  8. Every now and then, enjoy a bagged lunch picnic as a reward for finishing a project or mastering a skill.

Best Homeschool Hacks Contest Winners

We have TWO!

First, a behavior focused tip from Kathryn R. in Michigan:

When my five year old son is excited or anxious about some plans or what's going to happen next, I provide him a little picture schedule to carry. When he asks me (for the umpteenth time!) what is happening, I refer him to the schedule and simply say, "Look at what we're doing now. That's all you have to think about for now." This little schedule helps him focus on the present but still let's him see what is going to happen next PLUS it saves me lots of words and potential frustration. I can even just point to the schedule or simply say, "Check your schedule."

Next, a basic skills practice tip from Stacia M. in Indiana :

We found some Melissa & Doug placemats that have numbers and counting on them. One is "count to 10" which is one of Kieran's kindergarten goal, so that sits at his place at the table for him to use to review. The other is for our younger son and is "numbers 1-10". He's had fun looking at and recognizing the different numbers. I'd like to get others to switch out, too!

Thank you, ladies, for your participation and willingness to share your simple and successful "homeschool hacks"!


Best Homeschool Hacks Contest

Do you have an awesome but inexpensive (and simple!) tip for homeschool parents - something that has proven to be effective and perhaps even FUN? This could include ideas for children of any age in organization,  academics, behavioral concerns, training in the faith  - or even tips for mom's time management..  All entries are welcome - whether you're currently homeschooling or not.  After all, home is the first school, right?

Please fill out the form below to enter your idea in the "Best Homeschool Hacks Contest". Winning entries will be attributed to you and featured here at the Winsome Ways blog.


Pennies from Heaven - Part 1

If you've got a couple dollars to spare, I've got a great multipurpose, real-life math manipulative for you, and you may not even need to leave your house to put it into action! At most, a quick trip to the bank should be all you'll need to do in preparation.

What You'll Need: 

  • One dollar bill
  • 100 pennies
  • Two penny rolls (many banks will give you these) 
  • A 10"x10" square of one-inch graph paper  (can be purchased or made like this one from a piece of scrapbooking paper or tagboard) 


Why You'll Want to Try This:

Developing math reasoning - understanding the "how" and "why" of mathematical concepts - is vital for children to become proficient in this area of study. Manipulatives are great for this, and real world, motivational manipulatives can enhance their effectiveness. With the exception of food, what better motivation is there than money?

So many different skills, from fine motor development and counting to fractional parts and decimal equivalency, can be taught or reinforced with these simple materials. In fact, the instructional possibilities of this $2.00 investment are so vast, I will be breaking them down into developmental and skill categories and posting on them here over time. 

So, let's get started!

Beginning Number Concepts (preschool - 1st grade): 

  • Fine motor skills
    • Writing numbers
    • Stacking coins
    • Filling penny wrappers with coins (this may be too challenging for many at this age)
  • One-to-one correspondence, and  counting to 100
    • Number the graph paper from 1-100 (either you or the child - depending on age and ability).
      • You may also cut another sheet of graph paper into 10 square strips, numbering them from 1-10 and using them to count out 10 pennies at a time. These strips can then be laid on top or beside the  rows of the 1-100 sheet to break the skill down and/or show correspondence.
      • Use the 100 square graph paper to count out pennies.
        • Depending on the child's ability, you may start by counting to 10, 20, etc.
        • As described above, you may use strips of 10 square paper to break this skill down. 
      • Show the child that one penny is equal to the numeral 1 and so on.
  • Grouping - 2s, 3s, 5s, 10s, etc.
    • Make stacks of pennies (5s, 10s, etc.) on top of the corresponding numeral on the graph paper.
    • Use groupings to practice counting by 5s or 10s.
      • Lay 10 pennies on numbered paper from 1-10.
      • Slide pennies to the right and stack on the square marked 10
      • As the child's ability dictates, continue on through each row 11-20, 21-30, etc.
      • Gently move stacks to the right of the number and practice counting by 10s.
      • Use the above method to practice counting by 2s, 3s, 5s, etc.
  • Greater than/less than
    • Using the terms "greater than" and "less than", compare the height of penny stacks.
    • Compare the length of penny rows on the graph paper.
    • Compare the value of different amounts of pennies (see below).
  • Basic money concepts
    • Introduce the term "cent" as equaling one penny.
    • Place one penny on each square of the graph paper and discuss how 10 pennies equal 10 cents. Continue on through the rest of the 1-100 graph paper.
    • Place 10 stacks of 10 pennies on the dollar, discussing how 100 pennies/cents equal one dollar.
    • Introduce the term "tithe". Pull one penny from each stack or row of 10 to show what that looks like. Begin setting aside a tithe for Sunday's offering at church. Consider helping your child set up a savings program with the remaining money.

Next time, we'll take a look at some skills and activities applicable for the next level.

Time's Up!

For students who find it difficult to begin, stay with, or complete a task, time's up! Or perhaps I should say - timers are up!

From the lowly plastic, rotary kitchen timer to a stop watch to this iPhone app - timers are simple but powerful tools to equip children with ways to harness time and use it to their advantage.

Consider utilizing them in the following ways:


  • Conference with the child as to a reasonable amount of time in which to finish a specific task.
  • Be willing to assist him if he is unrealistic in the amount of time he selects.
  • For additional motivation, tell the child you think he can complete the task in (select an amount of time that is slightly longer than the one he chose - and one you are certain he will beat).
  • Don't be shy about hamming it up a bit by adding some playful competition in your time selections. You'll likely find your student will want to beat the time you wisely choose to challenge him with, and will work hard to do so. Celebrate when he does!
  • When possible, allow the child to start the timer himself.
  • When possible, allow the child to keep the timer by his side - starting it when he is ready.
  • If seeing the time go by is too stressful for the child, you may want to cover the timer or keep it in a location in which he cannot see the time count down to zero.
  • Break lengthy assignments into sections and set timer goals for each.
  • Shorten the amount of time or lengthen the assignment gradually as he succeeds.
  • Reinforce his success primarily with verbal praise but consider additional motivators such as small treats or activities.

This simple method of time management gives your easily distracted child ways to break down a task into manageable chunks. It empowers him to get a handle on time - and all the more if he is permitted to operate the timer himself. It gives him something to compete against (the clock!) and shows him (sometimes with your help) that he can be successful.

And we all know - time flies when you're having fun!


Picture This!

There are many games and activities on the market that promote oral language development, but here's a take on one that you can make yourself with the added benefit of being able to tailor it to your child's age and interests.

What you'll need:

  • One or more 3 inch styrofoam cubes from a craft store (check the flower arranging department)
  • Permanent markers

What to do:

Draw a simple picture on each face of the cube. Take turns rolling the dice, using the pictures to prompt a sentence or ongoing story. These sentences can be as simple or as difficult as dictated by the age and skill levels of your child - from two word sentences for beginners to compound and complex sentences for more advanced students. As an added benefit, students who are developing written language may write the sentence they just created orally.

Different applications:

For a new take on the book report, have the child place simple pictures illustrating characters, settings, or plot lines from a recently read book. As the die is rolled, the child should tell something about this particular story element. 

To work on descriptive language, start by using the picture rolled in a simple sentence. Take turns adding modifiers to further describe both the nouns and verbs. Illustrate the final sentence for comprehension and fun. 

How else could you use these language skills cubes? I'd love to read your ideas in the comments section at the bottom of this page. 

A Winsome State of Mind

This week's Winsome Ways tip is not so much a method or teaching aid as it is a way of thinking. To be brief, being winsome in working with children is remembering to be open to the felicities that happen along the way most unexpectedly. 

This was recently driven home to me in a situation that arose with my dogs. No, I am not equating children with dogs. Rather, I am saying I relearned a lesson I thought I had mastered many years ago - this time in a different application - that of my pups.

When I embarked on a canine therapy ministry in early 2013, I decided I didn't want to wait one to two years before I could get started. With this in mind, I brought home a nine month old rescue pup thinking she would be able to start training immediately and then pass her Canine Good Citizen test and be good to go while the younger puppy grew. Indeed, Mercy completed her training with good results, but when it came time to take her CGC test, she was unable to pass all ten items. As time went on, she also began to show some unwanted behaviors that resulted in two additional obedience classes and more than a couple embarrassing moments for me, her handler.

Not only had my plans for her come to a bit of a standstill, I nearly lost my confidence and zeal for the ministry that I had been so excited to begin. Even so, I struggled on and a year later, took the risk of making arrangements for the younger dog to attempt his therapy dog evaluation. As the day approached, I nearly backed out but went anyway. Long story short, my younger dog, Justice, passed not only the Canine Good Citizen but the test required by Therapy Dog International as well. It may sound strange, but that day just last week was one of the happiest of my life for a number of reasons. Thanks to God's provision for Justice's success,   the vision for a local canine therapy outreach has been strengthened, and I am ready to revisit Mercy's ability to become certified. Who knows? Perhaps I'll even attempt old man Mac. And thanks to the good words of my friend Cathy (read her stuff here), I was able to not only rejoice in my younger dog's success and the ministry's forward movement, I was reminded in a fresh way that, as with our plans for anything, our plans for our children do not always come to fruition in the way we had expected.

Children are living, breathing image bearers of the divine - created by Someone other than ourselves; created with purpose and by design. God's timeline for them is not always our timeline. God's plans for them don't always fall into place in the way we envisioned. The younger may outperform the older - at least for a time. But we must continue on - giving opportunities for all that they might achieve at their highest potential. We need to be willing to flex - to submit - to the good and wise ways of our loving Father. We need to trust Him rather than ourselves. We need to know that our children are His creation not ours - that it isn't about us - that they aren't us - that being their parents and teachers is all for His glory. We need to press on through failure and persevere when things don't go according to plan. We must not let labels or our preconceived notions of who they are limit them. Keeping our eyes on Jesus, we must keep to His course with eternity in mind, remembering that God's measure of success is not always the same as ours, and yet it is much higher and lovelier and purer than ours will ever be. 

Like I said - I thought I mastered this a long time ago, but it appears as though this old dog still needs to (re)learn a few not-so-new tricks. 

But one thing I do: forgetting what lies behind and straining forward to what lies ahead, I press on toward the goal for the prize of the upward call of God in Christ Jesus.
— Philippians 3:13-14

Triangle Flash Cards - Easy as 1, 2, 3!

Mastering math facts is an extremely helpful (if not essential) skill for a child to have in his math strategy arsenal. While some children with memory deficits may find this a challenge, most children can learn facts in the four operations (addition, subtraction, multiplication, and division) and should be encouraged to do so if at all possible. It will allow them to become fluent in math problem solving thus saving time while enabling them to tackle life application problems that they will need as they mature. Whether mastering math facts comes easily for your child or not, there's really no substitute for practice and drill. One simple and inexpensive way to learn facts is by using triangle flash cards, and (GOOD NEWS!!!) you can make these yourself. In fact, having your child make or help make them is a great way to boost his understanding of the skill. 

What you will need:

  • Heavy paper (construction paper, tag board, scrapbook page inserts, etc.)
  • Scissors
  • Ruler (optional)
  • Marker

What to do:

The slide show above will show you, step by step, how to take a rectangular piece of paper and make it into 4-6 equilateral triangles (great little geometry lesson here all by itself). Once you have your triangles, you can continue to make more in this way or use one of the completed triangles as a pattern. 

You may make as many flash cards as your child is comfortable working on at one time. For example, if working on addition and subtraction up to five, you will need only three triangles. In the corners of one, write 0, 5, 5 and follow with 1, 4, 5 on the second and 2, 3, 5 on the third with + and - signs in the center of each card (see slide for one example). With these three cards, your child will be able to practice twelve facts: 0+5=5, 5+0=5, 5-0=5, 5-5=0, 1+4=5, 4+1=5, 5-1=4, 5-4=1, 2+3=5, 3+2=5, 5-2=3, and 5-3=2 by simply using his fingers to cover the answer and then self-check. I would recommend teaching the entire number family that each card represents rather than separating addition from subtraction or multiplication from division. You may use color coding of the paper for different fact groups or of the numbers to indicate which one to begin with when subtracting or dividing. Speak or sing the facts as they are practiced for an added plus.

Here are some of the benefits of using triangle shaped flash cards:

  1. Fewer cards to store (I would suggest a zippered sandwich bag)
  2. Can be made inexpensively as you go
  3. Relationship of numbers in number families is emphasized
  4. For every number family learned, your child knows four facts (in other words, ONE FOURTH THE WORK of traditional flash cards!)
  5. The interconnectedness of addition and subtraction is made obvious
  6. Learning that adding numbers results in a larger number and, vise versa, subtracting from that larger number results in a small number
  7. Seeing that the order of the addends and factors is interchangeable (commutative property of addition and multiplication)
  8. They are tactile and kinesthetic

Can you think of others? Drop me a line!

Scene 1, Take 1 - Ten Tips for Comprehension Building

Studies indicate that good readers - those who understand, remember, and apply the written word - interact with the text by creating "movies" in their minds as they read.  In contrast, struggling readers do not. For some, this occurs naturally while others must be explicitly taught this skill. Today's Winsome Way will give you ten tips on how to develop this ability (note - #4 is simple magic!). 

  1. Read high quality literature* to your children. Use books with no or few illustrations or resist showing the illustrations immediately as you read choosing instead to discuss what the children "saw" in their minds. 
  2. Instruct the children to imagine the characters, setting, and plot as you read (they may close their eyes if that helps, and you may choose to focus on only one element at a time).
  3. Ask the children to fill in the blanks about details as they imagine them. Exchange "notes" among the children and yourself - describing what the characters and setting look like in each person's mind. 
  4.  Encourage the children to draw while you read. You may guide this by asking them to illustrate main characters, a scene from the story, or their most exciting/favorite part. Let the children tell about their drawings and display them when possible. Experiment with different media (crayon, colored chalk, pencil, markers, paint, etc.).
  5. As you read, pause to use the five senses to detail the sounds, sights, textures, smells, and tastes in the story.
  6. Let the children take the parts of main characters and reenact the story while you read or after the story session has ended.
  7. Interact with the story by recreating something the characters have done such as cooking a dish they've eaten, making a prop from the story, or taking an excursion to replicate something the characters did.
  8. Invite the children to dress up as one of the characters. Avoid making costumes for them - rather, allow their own imaginations to lead the way.
  9. Now and then, leave the children with a cliff hanger by stopping before the story or chapter has ended. Ask the children to tell, write, or draw what they think might happen next. You can even have them jot their ideas on paper to be collected and read in the future. Afterward, compare their versions with the author's.
  10. If there is a suitable video adaptation of the story/book, consider watching it (or a portion of it) with the children, comparing and contrasting how the two versions are alike and different from each other and from the children's imaginings.

Be prepared to help the children work through any insecurities they may have about being "wrong" (ie. different from the illustrator's depiction). Remind them that the activity is not an art lesson, but rather an exploration of the text. Explain to them the reason behind these exercises. Whenever possible, model the activity. Stick with it! I have found even the least confident "artists" or "movie directors" enjoy these comprehension builders and benefit from them as well.

*When my children were ages 7 and under (7, 4, 3, and 2), I began reading to them as a group but always selected books with the older children in mind (sometimes paraphrasing as I read for the sake of little ones' attention spans). We usually read one chapter a night, so they had to retain what we had read previously. Books such as these had very few illustrations, but the discussions we enjoyed as we went along were rich with imagery.

A Recipe for Success

Bringing your classroom into the kitchen is one way to give real life purpose to reading while rewarding children for a job well done as they enjoy the fruits of their labor - or in this case the brownies of their labor. This week's Winsome Ways post builds on the concept of "integrated instruction". In other words, how many academic disciplines can be interwoven into one lesson - particularly when that lesson involves real world, hands-on activities? So while the oven is preheating, let's take a look.


What you will need:

  • A packaged food item that requires following a simple recipe - you can make something "from scratch", but you will miss having much of the nutritional information that is on a boxed recipe.
  • Additional ingredients that must be added to those in the package
  • The necessary cooking utensils, cookware, and appliances

What to do:

  • Carefully look over all sides of the boxed item noting math concepts, directions, nutrition information, etc.
  • Jot down concepts that can be taught under various academic headings 

Here's an example of connections appropriate to a 3rd-6th grader (and, depending on the child's needs, some that can modified for younger or older) that could be drawn from this boxed brownie recipe:

Reading 

  • Following directions 
  • Identifying abbreviations 
  • Vocabulary 
  • Basic comprehension
  • Reading a chart and applying its information (nutrition label)
  • Culminating activity to a story that has been read - Ex: If reading Farmer Boy, you may like to make some of the items from one of Almonzo's huge breakfasts.

Math 

  • Vocabulary and Abbreviations 
    • Gram (g), milligram (mg), percent (%), less than (<), inch ("), feet (ft.), tablespoon (Tbsp), ounce (oz.), pound (lb.)
  • Measurement
    • Point out 13x9 to the child (front of box). Look at different pans in your kitchen. Ask the child which pan he/she thinks might be 13x9 (explain this is inches). Use a ruler to check and select the proper pan. Also take this opportunity to review the other pan sizes (back of box). Can your child find pans this size in your kitchen? Can your child sketch out pans of this size? Relate this to geometry - is this pan a rectangle, a square, etc.?
    • Underscore the ounces only weight as compared to the pounds and ounces weight. Review 16 ounces to a pound.
    • Conversion of grams to milligrams and visa versa.
    • Note the English to metric weight conversions. If the child is old enough to explore this further, investigate conversion calculators online and even practice making some conversions using pencil and paper.
    • Discuss the calorie as a concept of measurement.
    • Discuss Fahrenheit temperatures. Have the child set the oven temperature. Use an online temperature converter to find out what the Centigrade equivalent would be.
    • Have the child actually perform the measuring using kitchen utensils and/or a kitchen scale used to weigh things.
    • Have the child set the timer. Can he convert minutes to hours and visa versa?
  • Multiplication/Division Facts 
    • Manipulating the factor pairs that could possibly be used when cutting the brownies to serve x number of people
  • Fractions 
    • Understanding 1/2, 1/3, 1/4 as well as mixed number 1 1/2 (these are all used on the box) when measuring
    • Using fraction concepts when cutting the brownies (and for some, making a connection here to decimal parts and/or percent)
    • Noticing and experimenting with the fact that when you want to feed more people, you need to cut the whole pan into more pieces which makes the brownies smaller (pointing out that as the denominator gets larger, the pieces get smaller - thus comparing fractions)
  • Math Reasoning 
    • Ordinal numbers (1st, 2nd, 3rd)
    • Think and discuss - If you use a larger pan, will the brownies be thicker or thinner than when baked in a small pan? Test and analyze why this is so.
    • How much of each ingredient would you need to double or triple the number of servings? Can you halve it? 
    • Comparing number values

Science

  • Chemical reactions 
  • Mixtures
  • States of matter (solid, liquid, gas)
  • Analyze why a high altitude might require different directions.
  • Explore why different size pans necessitate different cook times.
  • Explain why a shiny pan needs  a different heat setting than a dark pan.
  • Vocabulary

Nutrition 

  • How does this fit into a food pyramid?
  • What is a serving size? Is it always the same?
  • How many calories does a person need (adjusted for age, etc.)
  • Vocabulary - cholesterol, sodium, potassium, carbohydrates, protein, fiber, iron, thiamin, riboflavin, etc. What affect do these have on the body?
  • Daily nutritional values including calories

Social Skills/Oral Communication/Manners 

  • Modeling and developing question/answer format in conversation (as you prepare and later as you enjoy)
  • Role play how to politely offer and serve food to guests (you can get as elaborate here as the age and/or needs of the child dictate)
  • Role play being a polite guest (taking the first brownie you touch, please and thank you, napkin on lap, etc. - again dependent on child's age/needs)
  • Modeling and practicing polite conversation as you enjoy your treat

Life Skills 

  • Planning ahead and organizing the activity (this could start at the grocery store)
  • Safety in the kitchen including cleanliness (with appliances, utensils, raw eggs, washing hands, cleaning up, etc.)
  • How to read a recipe
  • How to properly use ingredients and utensils
    • Preheating an oven (throw in the meaning of the prefix "pre" here, too!)
    • Measuring cups at eye level
    • Using a straight edge to level off a measuring spoon
    • Cracking an egg
    • Greasing or lining the brownie pan
    • Allowing the brownies to thoroughly cool before cutting (and planning ahead to allow sufficient time for this)

Seems limitless, doesn't it?

Obviously, you wouldn't want or need to hit all of these items in one setting, and particularly with a special needs child, you may want to focus on one section at a time.  I have only listed many ideas in order to illustrate the possibilities such an activity affords. Not all the lessons are suitable for all children, and you'll notice that some, such as those under communication and life skills, might be great for children who are young or developmentally delayed.

Now, what have I missed? I'd love to hear your take on an integrated cooking lesson such as this - truly an opportunity for creating a recipe for success in your child's life! Please leave me a comment!

The Complaint Department

This week's Winsome Ways post will focus on a behavior that is common among children - and sadly some adults who never outgrow it.

Ever wonder what to do with the child, often a pre-teen, who is quick to find fault - with peers, parents, playthings, or pastimes? Perhaps he has a tendency to tattle or just complain, complain, complain. Sometimes such a tendency is a function of an underlying developmental or behavioral challenge or an extreme need for controlling the environment. Other times, a generalized spirit of discontent becomes a part of the climate of a classroom or family like a tropical depression that will not move. Regardless, one thing is certain, whether it's a fun, summer day or one smack dab in the middle of the school year, who wants to use up valuable minutes and energy with the minutia that can often consume a family or a classroom when one of its members tends toward this type of behavior?

A few years ago, I found a simple and surprisingly effective way to address this situation when other methods had failed. I simply capitalized on the "strength" of the easily offended child (or children), and put him in charge of the "Complaint Department". That's right - the Complaint Department!

What you will need:

  • A box or container marked COMPLAINT DEPARTMENT (you may cut a slot in it if you wish)
  • Slips of paper (you may create a simple complaint form or just use blank pieces of paper.

What to do next:

Predetermine a time when you calmly and matter-of-factly tell the child(ren)with this particular "gift" that you've noticed he has an acute sense of right and wrong - a deep and abiding desire for justice - and as a result, you are placing him in charge of all complaints. At this point, present him with the Complaint Department box to hold all such complaints, and advise the other children in your care that they should forward all future problems, issues, and yes, complaints to "Johnny"* who will now be running the Complaint Department. Further explain that all complaints must be written down and placed in the box (rather than blurted out) and that "Johnny" will be responsible to empty the box daily and address each complaint. "Johnny" must not only receive the complaints (including his own) but must find a way to resolve the issues as well. Expect some surprise and/or push-back to the idea, but insist everyone give it a try for at least a few days.

As a former public school teacher, this is pretty much where the exercise began and (soon) ended. "Johnny" was far less eager to complain if his problem 1) had to be written down, 2) needed to be put aside until later, 3) could not be used to offend others, 4) did not succeed in hijacking valuable instructional time, and 5) required him to think of a way to solve it. I was always pleasantly surprised to find that the need for a Complaint Department had a mercifully short life. 

In a Christian context, a far richer experience can result as you weave biblical principles into the lesson.

  • Matthew 18:15 will be the foundation for addressing complaints among people. 
  • Proposed solutions will be considered in light of Scripture.
  • Prayer to seek God's wisdom will be encouraged.
  • "Johnny" may seek the help of others in the family or classroom to resolve problems.
  • The parent or teacher has the final authority over all proposed resolutions.

What will likely result from this little experiment will be a (formerly) complaining child who:

  • learns responsibility for his own thoughts and behavior,
  • gains control over thoughtless outbursts of discontent, 
  • develops the ability to wait until issues can be dealt with properly and at an acceptable time,
  • no longer succeeds in avoiding work or other things he does not want to do by complaining,
  • learns to be selective about the things he allows to bother him, and
  • ultimately moves away from this mode of dealing with life's frustrations.

As a Christian educator, you have every opportunity to help "Johnny" and all your children grow in contentment as well as the ability to be a problem solver rather than a problem maker. As a result, your classroom and/or family atmosphere will more than likely improve along the way.

If not... well, there's always the Complaint Department. ;)

*In the case of more than one "Johnny", responsibility for the Complaint Department can rotate.

How to Eat an Elephant

"How do you eat an elephant?"

"How?" asked the frustrated fourth grader.

"One bite at a time," smiled the teacher*, and though the child moaned in response, the point had been made.  

Any time you have a child who is struggling with acquiring a skill, ask yourself how you can break the skill down into manageable chunks so that "the elephant" can indeed be eaten a little bit at a time.

One skill set that many children struggle to master is learning the basic multiplication facts. Often times, such struggling students become overwhelmed by what appears to be the insurmountable task of memorizing innumerable answers to a vast array of unrelated facts. Over the years, I have found the following exercise a simple but powerful tool that not only breaks the skill down but gives the child visual evidence of his/her progress over time.

You will need: 

  • graph paper (use regular as shown or 1/2" or 1" for younger students or those with visual-motor delays)
  • scissors
  • pen for teacher, pencil for student
  • timer (kitchen timer, egg timer, stop watch, the timer app on your phone, etc.) 
  • highlighter

To create:

  • Decide if you want the child to work on facts from 1-10 or from 1-12. If you will be working on 100 facts, count across and down 11 graph squares. If working on 144 facts, count 13 across and down. 
  • Starting in the upper left hand corner, make a multiplication sign. From there, write the numbers 1-10 or 1-12 across the top and again going vertically down the left hand side below the multiplication sign. To save time in the future, you may photocopy the master.
  • Cut the graph paper out according to the size you will be using.
  • Explain to the child how to fill in the chart and/or show him a completed one. Let him know he may skip around (ex. do the 1s, 2s, 5s, and 10s first). Encourage him to finish an entire series both horizontally and vertically before moving on to a new one.
  • Set the timer (or better yet, let the child set it) for a predetermined amount of time (I'd suggest 5-10 minutes initially) and let the child begin, working until the timer rings or he has filled in as many squares as possible.
  • Check for accuracy (or allow the child to use a completed chart to do so). Erase any incorrect answers and have the child highlight any empty squares (including those that are now empty due to being erased).
  • Work on this body of facts over the next couple days and then decide with the child (guiding when necessary) the next set of facts to tackle. Strategize with him on ways to remember or figure out products in that group (see tips below).
  • Repeat daily, highlighting as before. Point out to the child that the highlighted area (which indicates the facts he does not know) is shrinking.

In the illustration above (please note, this is just one sample of how a child's progression might go), the chart at the top shows all the 1s, 2s, 3s, 5s, and 10s being completed along with most of the 11s. Even so, you will notice that some of the 12s are completed because one number in some of their factor pairs is a part of a formerly mastered series. In that chart, there are 35 out of 144 squares left empty. The second chart adds in the 9s which results in 29 out of 144 unknown. In the third chart, only 17 squares remain empty after the 12s have been completed, and in the final chart, just 10 spots are blank after the 4s have been mastered. You may also state these statistics in positive terms if that appeals to you and your child more (i.e. 109/144, 115/144, 127/144, and 134/144 learned).

In doing this exercise, the child will be able to see:

  1. the relationships among the numbers.
  2. that he knows more facts than he doesn't.
  3. that if he knows 3 x 4, he also knows 4 x 3.
  4. that the more simple facts he learns, the more difficult facts he will automatically learn as an outgrowth of the simple ones.
  5. his progress is visible right before his eyes.
  6. that "the elephant" isn't all that big after all!

Tips:

  • 2s - count by twos (ie. write a number, skip a number, and so on)
  • 3s - count by threes (ie. write a number, skip two numbers, and so on)
  • 4s - add four to the previous number
  • 5s - do the sing-songy 5, 10, 15, 20 that is used in hide and seek (play hide and seek if you like!)
  • 9s - point out the following pattern: in every product in the nines sequence, the digits add up to 9 (ex. in 18, 1 + 8 = 9; 27, 2 + 7 = 9; 36, 3 + 6 = 9 and so on - even the 9 + 9 in 99 = 18 and then 1 + 8 = 9). There is also a trick with fingers that I can share if interested.
  • 10s - each digit in ten's place goes up by one as the series progresses
  • 11s - for most of them, you will see double digits or "twins" (ie. 11, 22, 33, 44, etc.)
  • 12s - add 10 and then 2 more to the previous number in the series

Notice, if your child learns nothing more than the above tricks, he will only need to memorize 6 x 6, 6 x 7, 6 x 8, 7 x 7, 7 x 8, 8 x 8 and 11 x 11 because, although there were ten squares left, understanding factor pairs reduces the actual number of unknown facts. Integrate this quick exercise into your child's daily math routine, and consider setting goals and awarding small rewards as your child's number of unknown facts shrinks.

*my good friend Cathy

Short Vowel Sounds - Up and Down

There are many wonderful reading programs on the market that teach phonics or decoding in a variety of delightful and helpful ways. If your child struggles with reading fluency or decoding, I would strongly encourage you to investigate a multi-sensory approach in order to teach these skills.*  In the meantime or to supplement your current program, try this fun story and mnemonic device to introduce the vowels and their "short" sounds (which I concocted and successfully used years ago as a young teacher in southern Ohio).

You will need:

  • the letters A, E, I, O, and U - no "sometimes Y" today (use magnetic letters, letter tiles either homemade or store bought, or something similar). If making them yourself, you may write upper case letters on one side and lower case on the other so the child sees both forms. If you include your child in creating the tiles, you will have succeeded in integrating fine motor skills including cutting and handwriting into the lesson. Remember - the goal is not a slick, packaged look but a quick, inexpensive, and functional learning activity (with the emphasis on activity).
  • a container to act as the roller coaster car (this could be a small box, food storage container, etc.) that can also serve as a way to store the vowels for use later.

You may choose:

  • to tell the story with a simple drawing of the roller coaster,
  • to tell the story by acting out the vowels' movements in the air, or
  • both! (my favorite).

This video is only one (kind of cheesy!) example of how to tell the story - my apologies about the backward vowels - but it goes something like this (embellish according to your own style - you'll have more fun without the camera!):

One day the five vowels, A, E, I, O, and U, went to an amusement park (you can insert the name of a park your child knows or substitute the word "fair" for "amusement park"). They stood in line for some time to ride the roller coaster (again, insert the name of a favorite one here if you like), and when they finally got to the front of the line, all five of them piled into one car (have all letters in the box at this point). As they were going up the first, steep hill (pick up the letter O, and either move him upward on the drawing or in the air), Short O began to moan, (at this point, make the short /o/ sound as if you're very nervous) and all the other vowels looked at each other with frightened faces (act this out). No sooner had the car reached the top, than it came crashing down the slope and Short A could be heard screaming (now with A in hand and moving it downward, loudly make the short /a/ sound, holding the sound until you reach the bottom of the hill). With a thud, the car hit bottom, and (pick up U) Short U's stomach did a flip-flop. "Uh!" he grunted (grab your stomach as if you just got punched there). Just as quickly, the car sped onward and upward over a little cherry bump and Short I cried (with I in hand, make the short /i/ sound as if in surprise). By now, all the vowels were exhausted, and as the roller coaster car slowed and headed back on a straight path to the depot, (move E slowly toward the finish) Short E breathed a sigh of relief and softly whispered, "Ehhhhhhh."

Be as dramatic as possible, and encourage your child to participate in telling the story. Make sure he/she knows the hand movements that replicate the roller coaster ride so they can be used later as cuing devices. The sillier you are, the better - and don't forget the laughter! Keep in mind, this is only one of countless ways to provide scaffolding for children while they learn this skill. I'd love to hear other ways you have done the same!

* Wilson Reading System, Lindamood Bell, Barton Reading and Spelling for starters

Lessons Learned

Screen Shot 2014-06-25 at 7.23.53 AM.png

Sometimes the best "teaching tips" come from lessons learned along the way. This has been the case for me throughout the years and right here - right now. I've decided to leave that other post up regarding the email subscription issue as an illustration of this and to hopefully encourage others to hang in there when perplexed or driving down what appears to be a dead-end road.*

So please, allow me to recap this lesson learned:

  • Follow directions (I did but was still confused)
  • Use various resources at hand (viewed the online tutorial video and placed my email subscription code on my page - SUCCESS I thought!)
  • Don't assume things are working as planned - find a way to self-check (subscribed to the feed myself and found out subscription notifications were not getting updated)
    • Review your work (checked code and settings)
    • Reach out to experts for help (contacted tech support twice - was told to be patient as the subscription service updates once in a 24 hour period - but I am not patient)
    • Be persistent (contacted tech support a third time and was told the help ticket had now been "escalated")
    • Keep people informed of your learning curve (posted my announcement of "issues" - wondered if that would make me look stupid - decided I'm not stupid but sometimes do stupid things, and it's okay for others to know that)
    • Don't wait for someone else to fix things for you (unless it involves electricity)
    • Try at least a couple ways of doing things (created a new feed and placed the code for both feeds in different spots on the blog)
    • Ask for help from your friends (yeah - that announcement - and a few emails)
    • When you think you've found the answer to your problem, check it one more time (thus the rambling "Check. Check. Check." post)
  • Admit your mistakes (emailed the tech people back - admitting my lack of patience - and explained I had figured out the problem and that my help request could be "de-escalated". No answer - I think they've blocked my emails.
  • Take notes (I made mental ones in this case but often write things down for future use when necessary - sometimes on my left hand!)

So, long story short - I learned the problem was with the location of the code insertion. Hopefully, I didn't lose too many subscribers along the way, and hopefully, those of you who stuck with me will be encouraged to stick with yourself as you learn those life lessons that serve to make you the outstanding teachers you all are.

REAL SUCCESS!!!

*For "the rest of the story", check out the Winsome Ways blog.

Testing 1, 2, 3

Sorry for taking up space and time for this, but I'm still working on the proper coding, etc. for the email subscriptions I promised. I think I zigged when I should have zagged, so I'm attempting to retrace my steps and get this right.

And, perhaps that is a "winsome way" for us all to note as we teach.... Sometimes we (and that includes our children) need to learn how to untangle something that's gotten confused in our minds or practice. When our children find themselves in that predicament, often the best thing we can do for them is to give them time (and our "from-a-distance" support) to try different ways of sorting things out on their own. It can feel tedious when it would be so much simpler for us to solve the problem for them, but working the process will empower them to tackle future challenges.

As for me? You can be sure I'll keep my zigging straight from my zagging from now on!


Copyright 2015 Winsome Arrows